
Free delivery when you spend over £60
How to Use Lash Lift Kit?
You want long and voluminous eyelashes but don’t know where to begin. You don’t have to worry, because you can now learn how to DIY and use a lash lifting kit to achieve the long, voluminous lashes that your eyes deserve!
You can easily achieve a wide-eyed appearance from the comfort of your home with lash lift kits.
The procedure can seem complicated initially. Glmaoreeyelashes provides detailed instructions
on how to use lash lift kit efficiently to achieve the fluttery, raised lashes you seek.
Understanding Kit Parts
Learn about the eyelash products in the kit before you begin. Each kit includes a lifting cream, silicone shields or rods in various diameters, lash glue, and lash conditioner.
Step 1: Mandatory preparations
Start by ensuring your lashes have been cleaned and are free from makeup. This is important because any residue could impede the lifting process. Use an oil-free makeup removal product to wash your eyelashes properly. Once you’ve cleaned them, make sure to dry them fully.
Step 2: Select the correct shield size
The correct size silicone shield or rod is crucial. The different sizes are designed to accommodate different lengths and curvatures of lashes.
Select a size appropriate for your natural lash and curl. Shields with smaller diameters will produce a dramatic curl, while larger shields will provide a gentler lift.
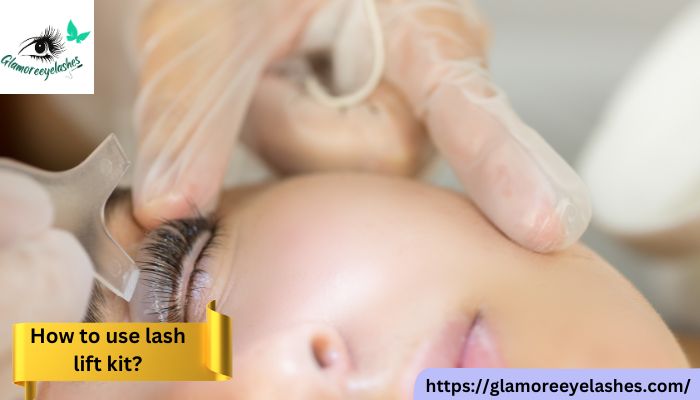
Step 3: Put on your shields
Use the included lash glue to apply the silicone shields on your eyelids, as close as possible to the lash line. To get an even lift, ensure they are securely positioned and the lashes are perfectly aligned on the shields.
Step 4: Lifting & Establishing
The lifting cream should be applied to the lashes, making sure they are coated but not saturated. The instructions in the kit will tell you how long to keep the lifting cream on. After the timer has gone off, carefully remove the lifting lotion and apply the setting cream. This procedure helps maintain the curl and secures the lift.
Step 5: Decontamination and Conditioning
Once the setting lotion is applied, it’s time to nourish your lashes. The lash conditioner in the box will help strengthen and moisturize your newly elevated lashes.
Step 6: Appreciate Your Results
The transformation is amazing! Separate clumped lashes with a clean spoolie and admire the beautifully lifted lashes.
The Bottom Line
Understanding how to use lash lift kit is a liberating and satisfying experience. However, it is essential to carefully read the instructions and perform a test patch to ensure you don’t have an adverse reaction to the products. With time and effort, you can get salon-quality raised eyelashes at home.
Read More:
